How much time do I have to install tile once mat has been applied to wall?
MusselBound allows the flexibility to install tiles immediately or at your own pace. Simply leave the backing paper on until ready to install tiles. If remove the backing and then decide to continue tiling at a later time, simply reapply the backing to the mat to prevent any dust from collecting on the adhesive surface. The adhesive does not “dry-out” so best efforts to replace the backing is ok.
Can tile be repositioned on the mat?
GENTLY applied tile may be lifted away from the mat and repositioned to the desired position. Use a flat edge tool (putty knife, screw driver, butter knife) to pry up the tile. If tile is resisting, see question below.
Do I have to tile a wall from the bottom up?
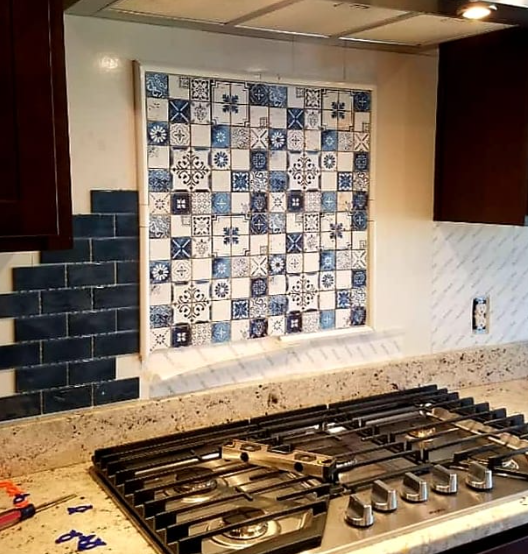
Unlike with mortar, you can start on the top or start on the bottom or even start in the middle like this mural, border and subway tile centered above a cooktop.
How can FIRMLY pressed tile be removed?
Mat is intended to provide a permanent bond. To remove, pry up a corner of the mat using a putty knife, gently pull mat back while applying LOW heat from a hair dryer. (Note: high heat will make adhesive gummy making removal more difficult.) Removal of mat will likely cause damage to wall. Can apply fresh mat over the mat that is attached to the wall.
Tile cut on a wet saw is not adhering to the mat?
Tile has absorbed moisture during the cutting process. Porous tile like ceramic can absorb as much as 30+% moisture. For non-porous tile like glass, simply dry the back with a hairdryer. Porous tile (ceramic/stone) will require drying overnight or may be placed in an oven at the lowest setting for 10-20 minutes. When cool enough to handle safely, attempt to reapply. If not successful, see question below.
How do I get tile that has been repositioned several times to adhere to the mat?
When applying a tile several times, the adhesive may become compromised. Apply mat directly to the back of the tile and trim to fit. Remove backing and apply to existing mat on the wall. Mat is on 1/32 inch thick (thickness of a credit card) and second layer of mat will not be noticeable.
How do I attached mosaic tiles that have detached from their mesh backing?
Apply mat directly to the back of the tile and trim to fit. Remove the paper backing from the mat and apply directly to the mesh on the wall. Mat is only 1/32 inch thick and second layer of may will not be noticeable.
I do I install tile edge like pencil tile?
Apply mat directly to the back of the tile and trim to fit. Remove the paper backing from the mat and apply directly to the mesh on the wall. Mat is only 1/32 inch thick and second layer of may will not be noticeable. If tile is fighting, can always use some construction adhesive and hold in tile in place with painter’s tape until adhesive cures.
How are individual tiny tiles installed?
Individual tiny tiles may have insufficient surface area to bond to the mat. May apply a small piece of the mat to the tile and then adhere the mat to the mat on the wall. Alternatively, may use construction adhesive or superglue to the back of the tile.
How do I replace a tile that became detached before grouting?
Typically, a tile that becomes detached from the mat before grouting was cut on a wet saw and was not thoroughly died before installation. Tiles absorb a great deal of moisture on a wet saw and should be dried in an oven to remove all of the subsurface moisture. Place tile into an oven on the lowest setting for 10-20 minutes. Since the adhesive on the mat may have become compromised, put a fresh piece of the mat onto the back of the tile and set the new mat onto the mat that is on the wall.